No products in the cart.
A picket fence, with its timeless charm and quintessential appeal, has the power to transform a mundane outdoor space into a picturesque haven. If you’re considering embarking on a DIY picket fence installation journey, you’re about to immerse yourself in a project that effortlessly blends aesthetics with functionality. In this all-encompassing guide, we’ll navigate through the vital stages of planning, designing, and executing your own picket fence. Moreover, we’ll explore creative ideas, troubleshoot potential issues, and share insights on themes, colors, and installation processes to help you realize your vision.
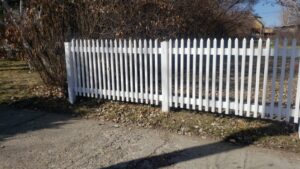
A picket fence is more than just a physical boundary; it’s an embodiment of charm that harks back to a simpler time. The neat rows of vertical boards have the uncanny ability to infuse any property with character and charisma.
Before you roll up your sleeves and dive into the world of DIY picket fence installation, it’s essential to outline the following factors:
The height of your picket fence sets the tone for its appearance and functionality. Equally vital is the spacing between the pickets, impacting both privacy and the overall aesthetic. Tailoring these dimensions to your specific needs is crucial.
Wood is the traditional choice for picket fences, exuding a timeless allure. Varieties like cedar, pine, and redwood offer durability and a natural appeal. Alternatively, explore modern alternatives like vinyl or composite materials for the look of wood minus the maintenance.
A picket fence is a canvas that allows you to express your style. Whether you lean toward classic elegance, rustic warmth, or cottage charm, your design choice will dictate the atmosphere of your outdoor space.
Getting Ready
Begin your DIY picket fence installation journey by gathering the necessary tools: a post hole digger, level, measuring tape, nails, hammer, and screws. Also, ensure you’re aware of any local regulations or permits required for your project.
Mapping the Layout
Employ stakes and string to mark out your fence’s intended layout. This step ensures a straight and even path for your picket fence. Measure picket spacing and pinpoint the spots where your posts will stand.
Digging In
Excavate holes for your fence posts using a post hole digger. The depth should accommodate around one-third of the post’s length. Consistent spacing between the posts is pivotal for a visually cohesive appearance.
Setting the Stage
Place your posts into the holes, using a level to ensure they stand upright. Fill the holes with a concrete mix, allowing it to cure for at least 24 hours before proceeding.
Attaching Rails and Pickets
Integrate horizontal rails between the posts, ensuring a level alignment. Fasten the pickets to the rails, employing even spacing for a harmonious look. Utilizing spacers ensures uniformity, and secure the pickets using nails or screws, based on your chosen material.
Adding the Finishing Touches
Complete your DIY picket fence installation with flair. Decorative elements such as finials on post tops can add an elegant touch. Elevate the aesthetic by painting or staining your fence to achieve your desired color and finish.
Dealing with Uneven Terrain
If your property is not perfectly level, adjusting post heights is a savvy solution. This ensures that your picket fence maintains a visually pleasing and uniform appearance.
Ensuring Stability
Incorporate horizontal braces between posts to enhance the stability of your fence. This precaution guards against leaning or swaying over time.
Personalized Creative Flourishes
Infuse your picket fence with a touch of your personality. Integrate small planters for charming vertical gardens or introduce whimsical elements like birdhouses to amplify the visual appeal.
Embarking on a DIY picket fence installation journey is more than just a project—it’s a process of self-expression and creative empowerment. Every step, from envisioning your design to executing the installation, contributes to the transformation of your outdoor space. Embrace challenges as opportunities, relish the satisfaction of accomplishment, and view your picket fence as a tangible embodiment of your craftsmanship and dedication to curating an inviting and captivating outdoor retreat.
Curiosity sparks progress at Cat’s Claw Fasteners! Reach out to us for answers and reach our Head Cat Collector, Ralph, through email at ra***@***************rs.com. Stay informed with our blog and follow us on Facebook, Instagram, Pinterest, and Youtube for more exciting content!
About the writer: Jake
Jake Walker is Cat’s Claw Fasteners go-to guy for anything related to fencing, gates, installation, and materials! Thanks to his background as a professional fencing installer as well as content writer, combined with a bit of his British twang and ideas from across the pond, he keeps the audience captive. Don’t worry if you don’t understand his British slang or sense of humor; we don’t always understand him, and he doesn’t always fully understand us.
Get in touch of Jake via email at ra***@***************rs.com , be sure to use ATTN:Jake if you have any questions about all thing social, writing, fencing, or just want to make fun of his British accent.
Read Next: The Best Fencing Options for Your Homestead
