In the previous episode of “keyword: Free Wood and cattle panels” , we discussed where to find free recycled lumber to build a raised garden bed.
Now that you have acquired your Pinterest fails worthy wood collection, it’s time to painfully disassemble the free recycled lumber pallets if you have chosen to go that route. The bottom rails tend to withstand abuse the best, so when salvaging keep in mind that those might be the best choice to save first when sacrificing boards. Hammer down remaining nails, or pull them, lest ye risk a trip to the USA Emergency Room and the aftermath with insurance billing… Or don’t, and leave them for your big toe to find later when you are traipsing through the gardens and lose your balance. (Kelsie Dehan-Rickett our main pallet pro, pictured, will be evaluating your choices as you progress! Choose wisely!)
Once you have disassembled and otherwise nail prepped the wood, you may decide that you wish to urethane the wood. This step is optional, isn’t super expensive or time consuming, but does take extra resources to complete the overall objective. As for our project, we elected to skip any extra protection for our raised garden bed.
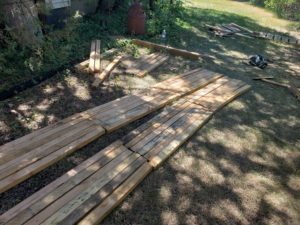
Next, it is time to lay out your grand master plan and see which warped boards blend best with the other less warped boards. (Free boards are always warped, I don’t make the rules of nature, I am but a simple slave to them.) If any pieces are sturdy enough to become the vertical joining boards, be sure to set those aside and cut them to similar lengths. This whole project is bound to be less than level, but we will give it our level best to be somewhat square! The overall objective is to lay out the 4 primary walls, and make sure that the corners are going to join up ok. (In the above photo, you can see that there is a pile of hopes and prayers at the top, next to the water bottle. Those are the boards we sized down later to become center sections that made 1 continuous board out of the 6 board segments.)
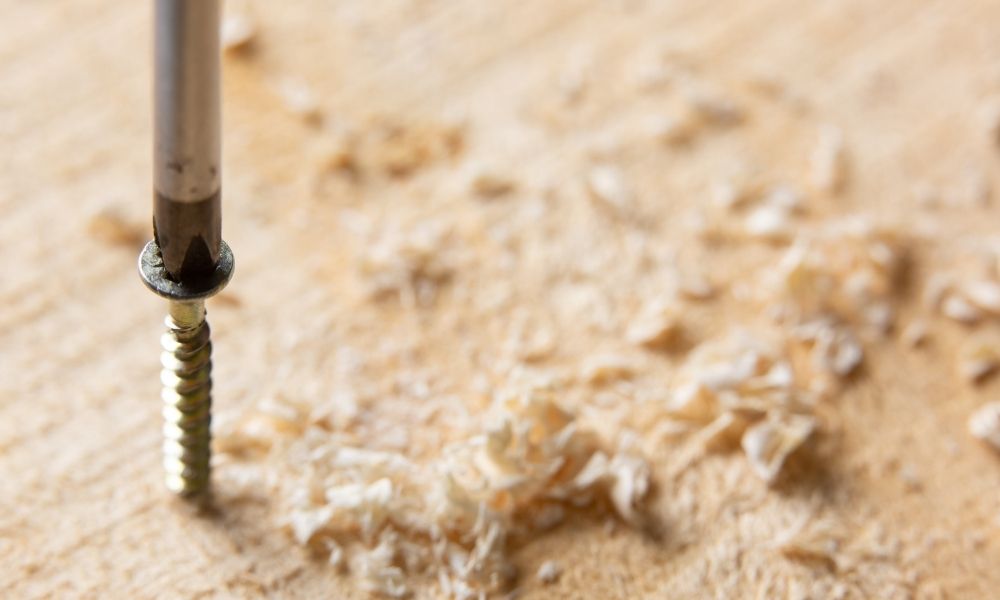
Be sure to grab a bottle of 14 x 3s! Unless your board’s depths require longer screws, a 14 x 3 screw is generally sufficient. The great thing about these 14 x 3s, is that you can snag a bottle directly from the shop section and get it headed your way ASAP for your projects. They don’t typically need any pre-drilling, as the design “spits out” the wood shavings they create… With the 14 x 3s in hand, it’s time to make like a California 5250 and commit! Go ahead and connect your individual planks to the board you intend to use as a joiner, but leave the corner posts for later. This part of the operation is best done near where you intend the final project to land. Hauling the heavy free recycled lumber is a pain in the… arsenal, be forewarned.
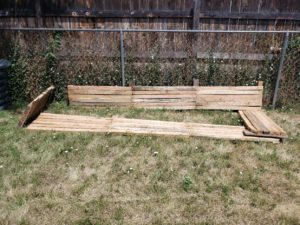
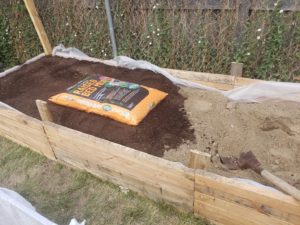
As you can see in the photo above, the joining boards are all about the same length and allow for at least 2 inches of the 6 board walls to overlap and securely attach with the lag screw.
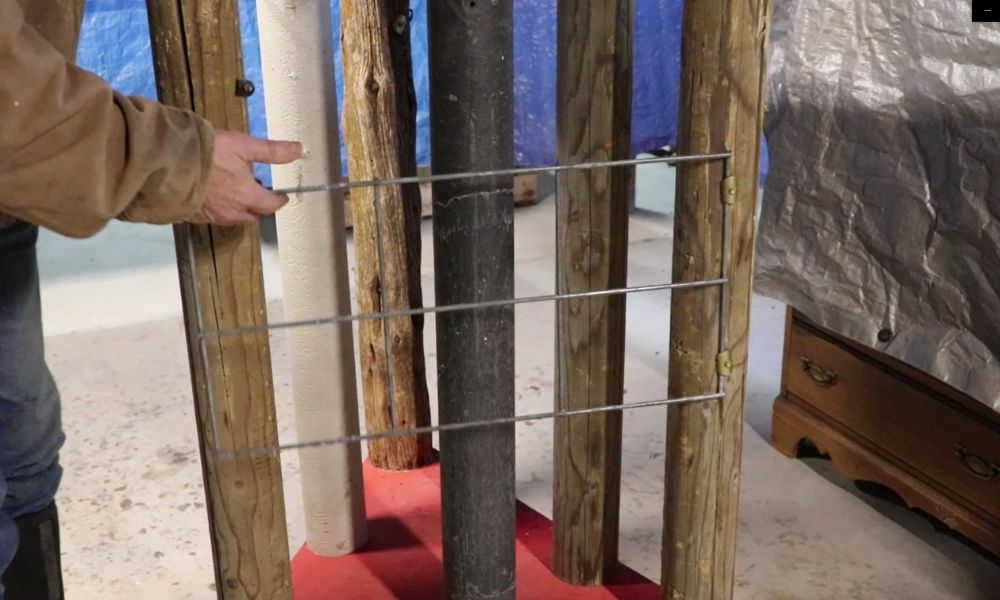
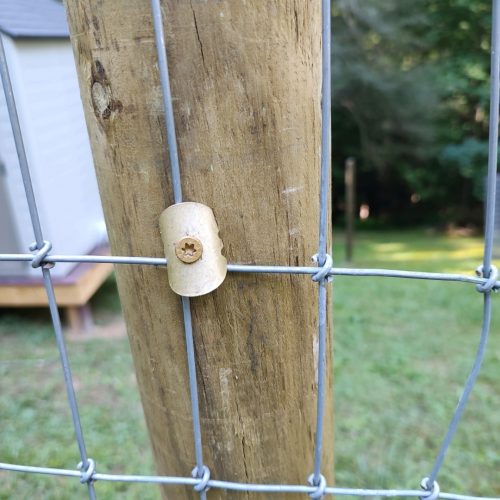
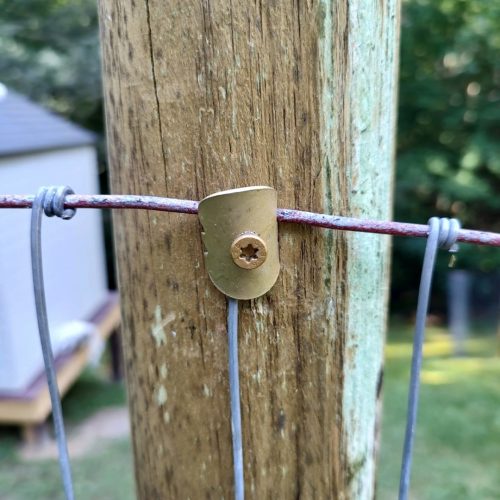
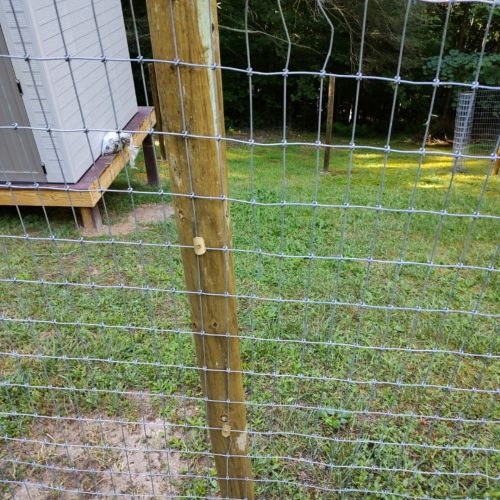
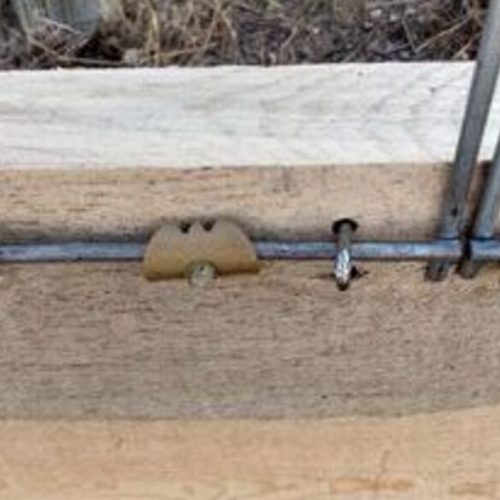
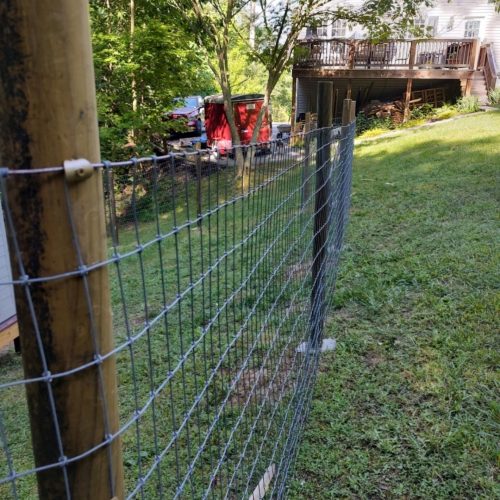
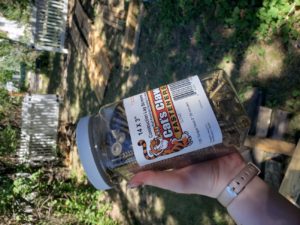
For our corner posts, we elected to use 2 x 4 posts that we could attach cattle panel or chicken wire to later, using Cat’s Claw fence claws, thereby allowing vines to take off on the back of the garden with shorter plants being in the front. NOW, you may attach the other walls to the corners. Trust me… It’s way easier this way.
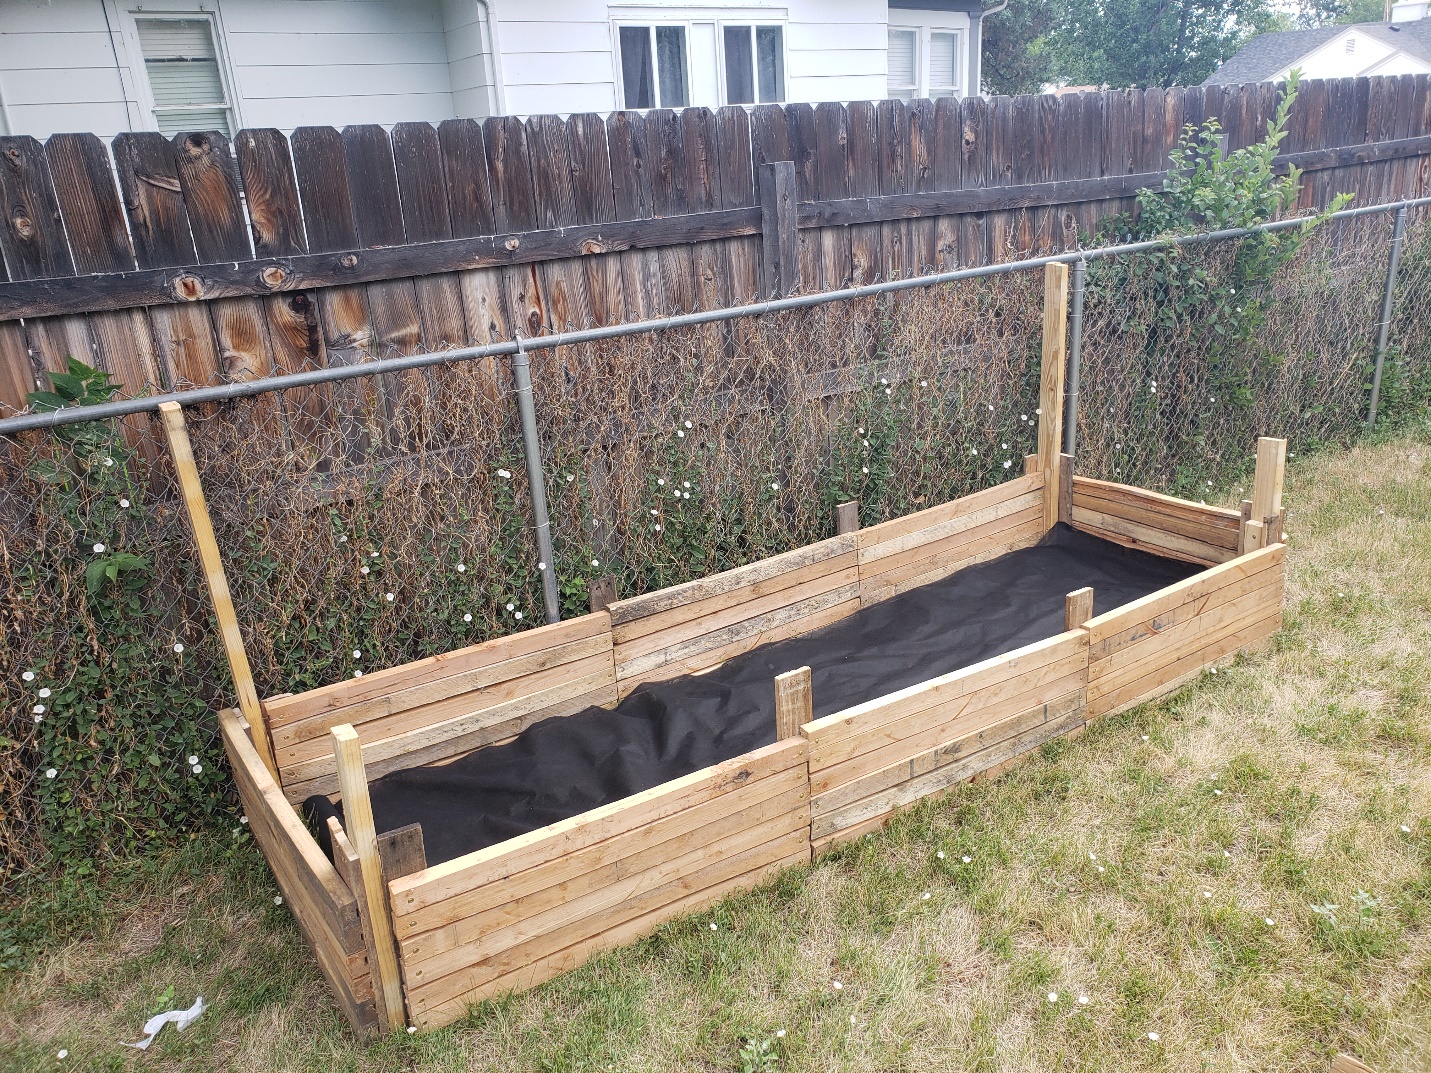
For maximum longevity, we recommend that a liner be placed all around the base and walls, to help prevent weeds from growing upwards. Heavy mil garden liner will help substantially. The photo below shows the back posts a little better. We additionally elected to leave raised corners in the front to place a tarp in case of hail. That story is for another time! 😉
And finally, it’s time to fill this sucker. While some native soils may be ok for the overall filling, we elected to do the majority of the bed with our favorite Raised bed mix from Walmart. When measuring cubic feet to purchase the soil at the store, simply measure the height x width x length and divide by the cubic feet listed on the soil bag, to know how many bags are necessary for the project. If this price-tag worries you a little bit, there are some great resources on rareseeds.com to help guide you in creating a mixed soil bed. Once you get about 2 layers of raised bed mix thrown in, we have found that we had most success with adding in some potting soil on top, to help the plants start easier and have less shock when first introduced.
Well, there you have it. The bare minimum basics on creating your very own, wood raised garden bed from free recycled lumber. Till next time, over and out!
With SeedsNow as your one-stop shop for premium, non-GMO seeds, embrace the joy of gardening! SeedsNow has a wide variety to fit your gardening needs, whether you want to grow bright flowers, delicious fruits, or nourishing veggies. Dreaming of a raised garden bed bursting with vibrant flowers and lush greens? Find a variety of seed alternatives at your fingertips, like the robust artichoke and the adaptable zucchini. For a varied and plentiful crop, don’t forget to look into their variety packs, such as the All-in-One Tomato Garden Variety Pack. Find necessary gardening supplies, such as reusable seed storage vaults and organic soil pods, to make sure your gardening endeavors are successful. With the help of SeedsNow, explore the world of gardening and watch your garden thrive!

Toby-Jeanne is the Cat’s Claw Queen, who infrequently gets roped into writing articles due to her crabby nature while word-smithing. She is a plant enthusiast, though none of her indoor plants have survived to adulthood. Fortunately, Ronnie the Cat’s Claw Cat is a little less picky about sunlight and watering schedules, so Toby-Jeanne has managed to keep him on the Cat’s Claw payroll since day 1. For any additional inquiries, the team at Cat’s Claw Fasteners is here to assist! Feel free to email your questions to our Head Cat Collector, Chava, at chava@catsclawfasteners.com. And, for more informative content, be sure to read our other blogs and follow us on Facebook, Instagram, Pinterest, and Youtube!
Read Next: Comparing Different Fence Fasteners and When To Use Them